

You can now design a table, and write a query that picks out just the rows you want. You can already build a frontend in Next.js, too. Until now, those two skills have lived apart. So how does an app you built read rows from a database you made?
You'll find out here, for a real client. Maya runs Code & Coffee, a meetup where 200 people are learning to code. Her members love sharing their wins, like a first pull request or a bug that's finally fixed. The trouble is that they share them in a busy group chat, where they've scrolled out of sight by the next morning.
Maya wants somewhere those wins can stay. She's calling it Chirp: a small site where members post short updates, and anyone can look back through them later. A designer has already built every page, but the posts on them are made up and come from a file. Your job is to give Chirp a real database, and to write its queries yourself, in SQL. It'll grow with you, one project at a time, through the rest of the course.
Chirp's pages show rows from your database instead of sample data.
First, get the designer's version of Chirp running on your computer. Every page is there already, but nothing is behind them yet.
Open the Chirp starter on GitHub and press Use this template, then Create a new repository. That puts a copy of it in your own GitHub account. Name the copy chirp, and clone it to your computer.
In its folder, install what it needs and start it.
npm install
npm run dev
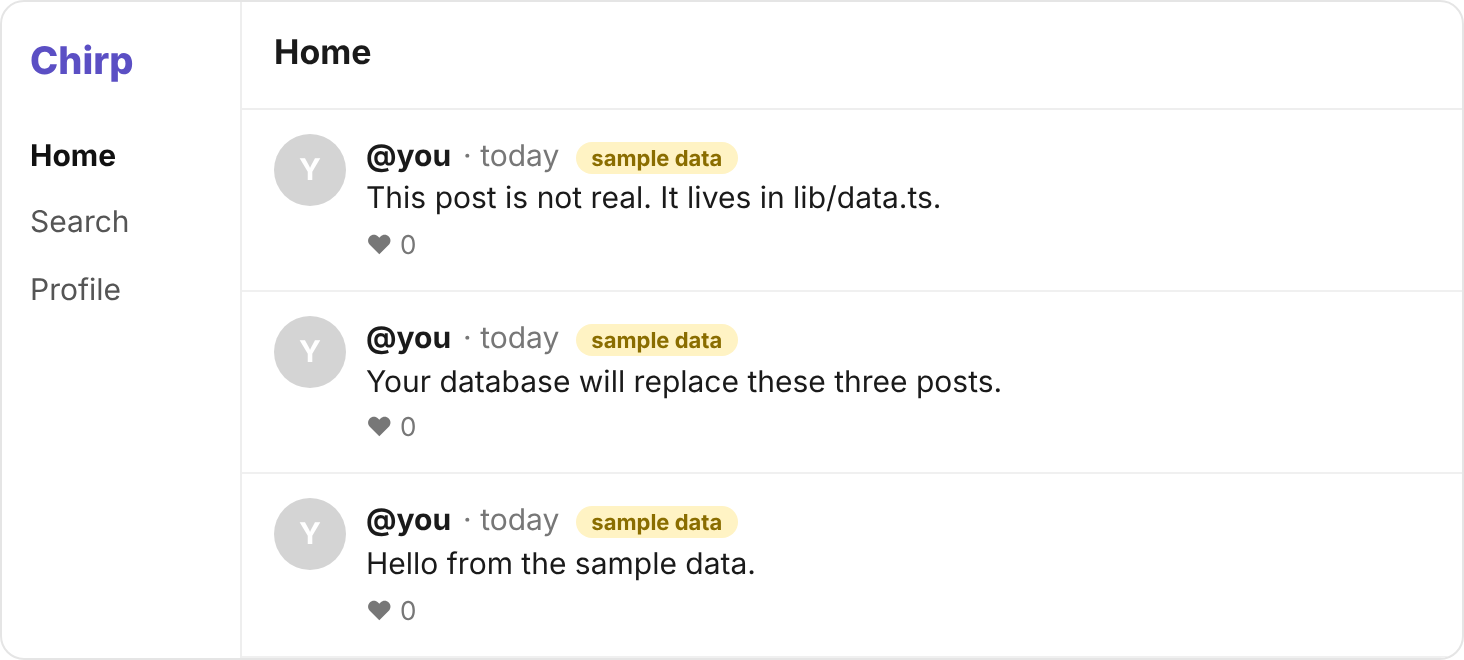
Then open localhost:3000 in your browser. The three posts you see come from lib/data.ts, not from a database.
You should see
Chirp's home page, with three posts in its feed, each tagged sample data. At the bottom, a grey badge says Not connected to a database.
Chirp needs a table to keep its posts in, one row for each post. Here is what Maya wants a post to hold:
| Column | Type | Rules |
|---|---|---|
| id | integer | The primary key, generated by Postgres |
| handle | text | Never NULL |
| body | varchar(280) | Never NULL |
| likes | integer | Never NULL, and starts at 0 |
| created_at | timestamp | Never NULL, and starts at now() |
A handle is the short name a member posts under, like ada.
Open your Supabase project, simplified-practice, and press SQL Editor. If Supabase asks about RLS when you run a query, pick Run and enable RLS, as you did before. You don't need to worry about it.
Your turn 1
Write the CREATE TABLE query for posts, from the table above, and run it.
Success. No rows returned under the editor.
CREATE TABLE posts (
  id         integer PRIMARY KEY GENERATED ALWAYS AS IDENTITY,
  handle     text NOT NULL,
  body       varchar(280) NOT NULL,
  likes      integer NOT NULL DEFAULT 0,
  created_at timestamp NOT NULL DEFAULT now()
);
You should see
In the Table Editor, a posts table with the columns id, handle, body, likes and created_at, and no rows.
Your table is empty, so Chirp would have nothing to show. Maya has sent you the first 20 posts from the group chat.
Paste this query into the SQL Editor, and press Run once.
INSERT INTO posts (handle, body, likes, created_at)
VALUES
  ('ada', 'Day 1 of learning SQL. SELECT star feels like a superpower.', 42, '2026-11-01 09:15'),
  ('ben', 'Why did nobody tell me about flexbox sooner?', 87, '2026-11-01 14:22'),
  ('cy', 'Hello, world.', 5, '2026-11-02 07:50'),
  ('dee', 'Centering a div on the first try. Screenshot it.', 311, '2026-11-02 19:05'),
  ('eli', 'Semicolons: optional in JS, required in my heart.', 73, '2026-11-03 11:11'),
  ('ada', 'Shipped my first Next.js page today.', 100, '2026-11-03 18:40'),
  ('ben', 'Reading the docs is a skill. I am leveling up.', 16, '2026-11-04 10:10'),
  ('dee', 'React state finally clicked for me.', 96, '2026-11-04 20:48'),
  ('fay', 'First pull request merged!', 189, '2026-11-05 09:40'),
  ('cy', 'Git commit, git push, deep breath.', 29, '2026-11-05 16:16'),
  ('ada', 'Tailwind makes me feel like a designer.', 250, '2026-11-06 12:05'),
  ('fay', 'Naming things is the hardest part.', 47, '2026-11-06 18:18'),
  ('dee', 'Sql joins are next on my list.', 58, '2026-11-07 09:27'),
  ('ben', 'my sql query finally returned the right rows', 64, '2026-11-07 21:30'),
  ('eli', 'Pair programming with a friend beats tutorials.', 22, '2026-11-08 15:35'),
  ('cy', 'Dark mode is not a feature. It is a lifestyle.', 204, '2026-11-08 22:11'),
  ('ada', 'Coffee, then code. In that order.', 31, '2026-11-09 08:02'),
  ('fay', 'Refactored it. Same behavior, half the code.', 12, '2026-11-09 20:55'),
  ('ben', 'TypeScript caught three bugs before lunch.', 173, '2026-11-10 13:45'),
  ('dee', 'Deployed. It works on more than my machine.', 150, '2026-11-10 17:20');
This is an INSERT query, which adds rows to a table. A later lesson teaches you to write one. Notice that it gives no id, so Postgres generates each one: 1 for the first post, up to 20 for the last.
You should see
In the Table Editor, your posts table with 20 rows. Row 4 is Dee's, with 311 likes.
Chirp's server needs to know where your database is, and it needs to prove it's allowed in. Both fit in one line of text called a connection string: your database's address, with your database password inside it.
In Supabase, press Connect at the top of your project's page, and find the connection string under Session pooler. Supabase offers a few ways in. Pick this one, and don't worry about the others. Copy the string.
In your chirp folder, make a file called .env.local with one line, and paste the string after the =.
DATABASE_URL=
The string has [YOUR-PASSWORD] in it. Replace that, brackets and all, with the database password you saved when you made the project.
Anyone who has this line can read and change every table you have. So it has to stay on your computer and out of GitHub. The starter already lists .env.local in .gitignore, so Git leaves the file out.
Stop npm run dev and start it again, so Next.js reads your new file. Then reload localhost:3000.
You should see
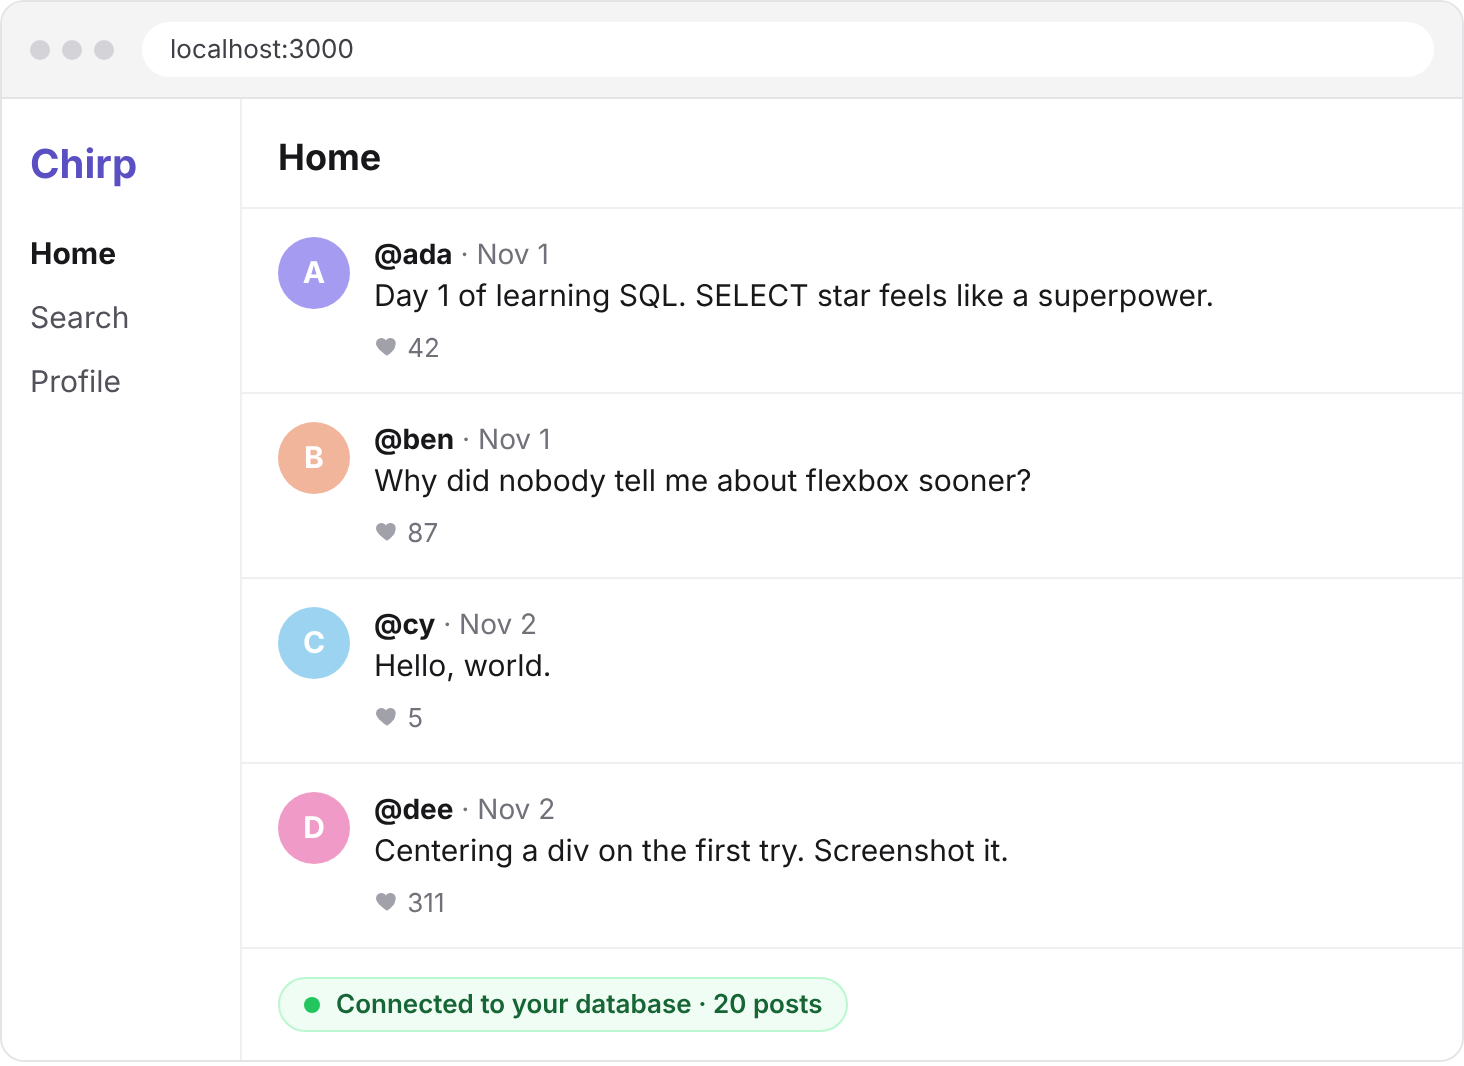
The badge at the bottom is green, and says Connected to your database · 20 posts. And git status lists no .env.local.
The badge reads your table, but the feed still shows the three sample posts.
Write the query first, in the SQL Editor. The feed shows each post's handle, body, likes and date. It needs each post's id as well, because every post links to a page of its own. Run this in the SQL Editor.
SELECT id, handle, body, likes, created_at FROM posts;
You should get Maya's 20 posts back. Now Chirp needs to send that same query itself, every time someone opens the page.
Open lib/data.ts and find getPosts(), which returns the three sample posts. Replace it with this.
export async function getPosts() {
  const rows = await sql`
    SELECT id, handle, body, likes, created_at
    FROM posts
  `;
  return rows;
}
That's your query between two backticks. You can leave the semicolon off here, because sql sends one query at a time.
The sql in front of it comes with the starter, and it sends the query to your database. The answer takes a moment to come back, so sql gives you a promise, like fetch() does, and you await it. You then get the rows as a list, one object per row, like { id: 1, handle: "ada", … }. If Postgres refuses the query, sql throws an error instead.
Save, and reload the page. The other boxes on it keep their sample data for now. The next Chirp project fills them in.
You should see
The feed lists 20 posts, and their sample data tags are gone. Ada's "Day 1 of learning SQL" is one of them.
From here on, you write the query.
Maya wants a page for each member, showing only that member's posts. The page at localhost:3000/ada is already built. It takes ada from the address and passes it to getPostsBy(handle), which still returns sample data. Filling that function in is your job.
There's one new thing. The handle changes with the page, so you can't type it into the query. Write ${handle} where the value goes, and sql hands it to Postgres as a value. Leave the single quotes off this time, though. The helper already tells Postgres the value is text, so quotes of your own would break the query.
It helps to get the query working in the SQL Editor first, with 'ada' typed in, then move it into the function.
Your turn 1
Make getPostsBy(handle) return that person's posts and nobody else's, with the same five columns as the feed. Let Postgres pick the rows: don't fetch every post and filter them in JavaScript.
localhost:3000/ada lists Ada's four posts and nobody else's, none tagged sample data.
And localhost:3000/zoe says zoe hasn't posted yet, because no post has that handle.
export async function getPostsBy(handle: string) {
  return sql`
    SELECT id, handle, body, likes, created_at
    FROM posts
    WHERE handle = ${handle}
  `;
}
You should see
Four posts on Ada's page, all hers, and zoe hasn't posted yet on Zoe's.
Each post on the feed links to a page of its own, like localhost:3000/post/9. That page hands the number in its address to getPost(id), which still returns sample data.
There's nothing new to learn for this one. It's a query you know, with a value in it, awaited like the others.
Your turn 1
Make getPost(id) return the one post with that id, as a single object and not a list. When no post has that id, make it return null.
localhost:3000/post/9 shows Fay's post, "First pull request merged!", with 189 likes.
And localhost:3000/post/999 says This post doesn't exist, with no error in your terminal.
export async function getPost(id: number) {
  const rows = await sql`
    SELECT id, handle, body, likes, created_at
    FROM posts
    WHERE id = ${id}
  `;
  // An empty result is a list with nothing in it, so there is no first row.
  return rows[0] ?? null;
}
You should see
Fay's post alone on /post/9, and This post doesn't exist on /post/999.
Commit your changes, and push them to GitHub.
git add -A
git commit -m "Read posts from the database"
git push
Then tell Maya where things stand: every post she sent is in Chirp's database, and on your copy of the site.
You should see
Your commit on GitHub, with the new lib/data.ts in it and no .env.local.
The badge stays grey after I add the connection string
The badge shows the error under it, so read that first. Then check the usual causes. Is the file called .env.local, and in the chirp folder itself? Is [YOUR-PASSWORD] gone, brackets too, with the right password in its place? Did you copy the Session pooler string, and not one of the others? And did you stop npm run dev and start it again?
The badge was green, and now it's grey
Stop npm run dev and start it again. If that doesn't help, open your project in Supabase. A free project is paused after about a week without use, and its page offers to restore it.
I don't have my database password
You can set a new one. In Supabase, open your project's database settings and press Reset database password, then put the new one in your connection string.
The badge says 0 posts, or 40
With 0, step 3's INSERT never ran, so run it now. With 40, it ran twice. In the Table Editor, delete the posts table, then do steps 2 and 3 again, running each query once.
Postgres refuses my CREATE TABLE
Read the word the error names, and check the line just before it. The lessons Column Types, Keys, Empty Values and The Schema each wrote a part of these lines.
Ada's page lists everyone's posts
Nothing in your query picks the rows yet. The lesson Picking Rows shows the part of a query that does.
In the SQL Editor, an error that says a column like ada does not exist
Postgres read ada as a column's name, not as text. The lesson Picking Rows shows how text is written in a condition.
My query works in the SQL Editor, but fails in the app
Look at how the value gets into it. Step 6 says what to write in the function, and what to leave off there.
A post's page says This post doesn't exist, for a post that does
Your function may be reading the rows before they've arrived. Step 5 shows how to wait for them.
A page that isn't there shows an error, not its message
A query that finds no rows hasn't failed. The lesson Picking Rows shows what Postgres sends back then, so check what your function does with that.
An error that says relation "posts" does not exist
Your database has no table with that name. Check its name in the Table Editor, and that your query spells it the same.
Tick every step once you've seen what it says you should see. Then mark the project complete to unlock the next lesson.